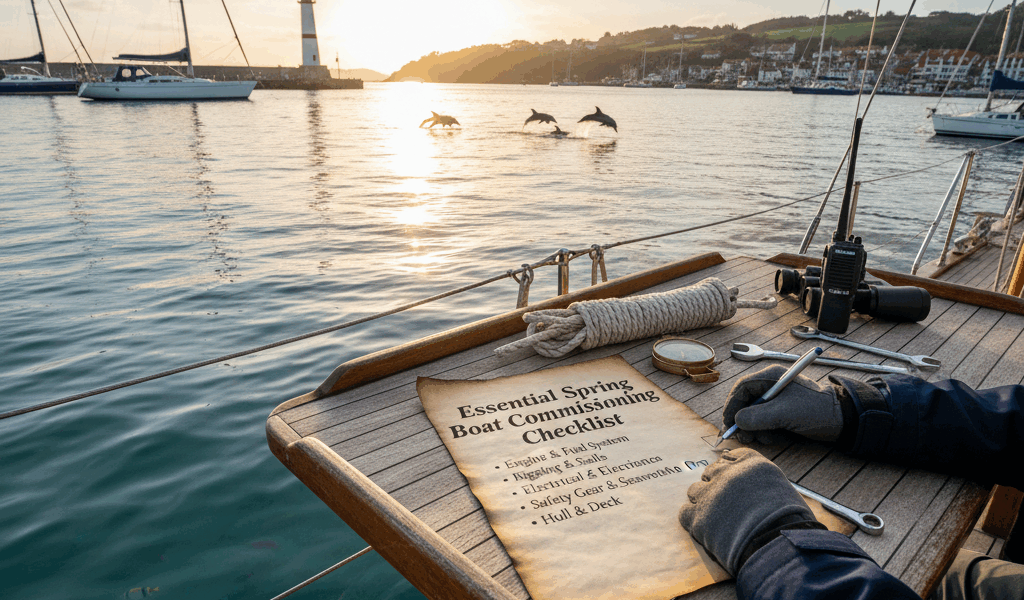
A boat commissioning checklist should prove that the vessel is watertight, mechanically reliable, electrically safe and legally equipped before the first full-speed run of the season. Do the work in stages: inspect while the boat is ashore, test systems at the dock after launch, then complete a conservative sea trial close to help.
This checklist is a planning tool, not a replacement for the boat, engine and equipment manuals. Fuel, propane, AC shore power, steering, rigging, through-hulls and pressurized systems can create fire, flooding, carbon-monoxide or loss-of-control hazards. Stop and use a qualified marine technician when a system is damaged, leaking, unfamiliar or outside your competence.
Boat commissioning checklist at a glance
- Confirm registration, insurance, manuals and outstanding winter work.
- Inspect the hull, deck, running gear, anodes and every below-waterline opening.
- Service engine, cooling, fuel, steering and control systems according to manufacturer schedules.
- Inspect batteries, charging, shore power, navigation lights and alarms.
- Test manual and automatic bilge-pump operation without discharging oil.
- Recommission potable-water and sanitation systems responsibly.
- Inventory required safety equipment and check condition and expiration dates.
- After launch, check immediately for water, fuel and exhaust leaks.
- Complete a low-risk dock test and sea trial before carrying guests offshore.
Before you begin
Gather the vessel and engine manuals, last season’s maintenance log, winterization notes and a written list of known faults. Confirm that launch arrangements, registration or documentation, insurance, marina requirements and local rules are current. If another person winterized the boat, find out exactly which systems were drained, bypassed, disconnected or filled with antifreeze.
Use a checklist specific to the boat. An outboard center-console, gasoline sterndrive, diesel sailboat and cruising trawler have different systems. Add manufacturer service intervals and safety notices rather than treating a generic list as complete.
1. Hull, deck and underwater gear—while ashore
- Walk around the hull in good light. Mark cracks, blisters, impact damage, distortion, loose hardware or unusual staining for evaluation.
- Inspect the keel, transom, chines and areas around struts, shaft exits, drives and transducers.
- Examine propellers for damage and fishing line. Check the shaft, strut, rudder, outdrive or outboard mounting for looseness or corrosion within the manufacturer’s limits.
- Inspect sacrificial anodes and replace them according to the equipment maker’s criteria. Rapid or uneven loss can indicate a bonding or corrosion problem that deserves diagnosis.
- Check seacocks and through-hulls for damage, corrosion and smooth operation. Verify that attached hoses are suitable, not cracked or swollen, and securely clamped.
- Confirm required drain plugs are installed before launch. Do not confuse a hull drain with a plumbing drain or leave an unknown fitting plugged.
- Inspect deck hardware, rails, lifelines, hatches, windows and latches. Look for water intrusion around penetrations.
- Clean scuppers and cockpit drains so rain or boarding water can escape.
Do not launch with a suspect below-waterline fitting, soft hose, loose shaft seal or unexplained hull damage. Those are flooding risks, not “watch it this season” items.
2. Engine, cooling and exhaust
Follow the engine manufacturer’s commissioning and maintenance schedule. At minimum, review the status of engine and gear oil, filters, coolant, belts, hoses, clamps, water-pump impeller, strainers, zincs or anodes, spark plugs where applicable and any work deferred during haul-out.
- Look for oil, coolant, fuel or salt residue that may identify an old leak.
- Inspect raw-water intake components and confirm winterization plugs, caps and hoses have been restored correctly.
- Check exhaust hose and accessible components for cracking, scorching, corrosion, leakage or loose clamps.
- Verify engine-room ventilation and gasoline-vapor blower operation where fitted. Follow the boat’s starting procedure.
- Confirm throttle and shift controls move correctly before starting. Do not force stiff controls.
- For outboards and sterndrives, inspect the propeller, gearcase, skeg, bellows and trim system according to the manufacturer’s instructions.
Never run a raw-water-cooled engine dry. Use only the manufacturer-approved method for running ashore, and keep people clear of propellers and moving equipment.
3. Fuel and propane systems
Fuel odor, wet fittings, cracked hose, corrosion or unexplained fuel loss is a stop-work condition. Ventilate, eliminate ignition sources and have the leak corrected before energizing equipment or starting an engine.
- Inspect accessible tanks, fill hoses, vents, supply and return lines, primer bulbs, filters and connections.
- Verify deck-fill labels and caps so fuel cannot be placed in a water or waste fitting.
- Check for water or contamination using the fuel-system procedure approved for the engine.
- Do not top off the tank. The EPA advises boat owners to know tank capacity and calculate the amount needed to reduce fuel spills.
- Have LPG/CNG systems, lockers, regulators, solenoids, alarms and hoses inspected and leak-tested by a qualified person using the correct procedure.
Do not use a flame to search for gas leaks. Do not discharge fuel, oil or oily bilge water into the marina.
4. Batteries, DC and shore power
- Inspect battery cases, restraints, terminals, cables and overcurrent protection. Replace damaged components; clean and torque connections to manufacturer specifications.
- Confirm bank isolation and selector-switch operation. Load-test batteries when condition is uncertain.
- Verify charging voltage and operation of alternators, shore chargers and solar controllers within their documented ranges.
- Test navigation lights, interior emergency lighting, horn, wipers, pumps and critical alarms.
- Inspect shore-power cords, inlets and adapters for heat damage, corrosion, cuts or loose parts. Never use a damaged cord.
- Test ground-fault or equipment-leakage protection using the manufacturer’s test control, and have failures diagnosed by a qualified marine electrician.
Marine AC and bonding faults can cause shock in or near the water. Do not improvise household wiring repairs aboard a boat.
5. Bilge pumps and leak detection
The original warning behind this checklist—a bilge pump running unexpectedly—is important. A pump cycle may reflect rainwater or normal drainage, but it can also be the first evidence of a failed hose, shaft seal, through-hull or plumbing connection.
- Clean debris from pump strainers and the area around float or electronic switches.
- Test each pump from its manual control and test automatic operation using the manufacturer-approved method.
- Confirm discharge hoses are secure, routed correctly and not blocked or split.
- Test high-water alarms and remote indicators where fitted.
- Trace unexplained water to its source instead of relying on the pump to manage it.
- Keep oil-absorbent material available and handle contaminated water lawfully.
A bilge pump is a backup, not a repair. Do not leave the dock with unexplained water ingress or a pump that cannot keep up.
6. Fresh water, sanitation and other plumbing
Restore water-heater bypass valves, pump strainers, accumulator settings, filters and drain plugs according to the winterization record. Flush potable-water antifreeze and sanitize the system using the boat or component manufacturer’s procedure. Confirm that the antifreeze used was intended for potable-water systems; automotive antifreeze is toxic.
Pressurize the system while accessible and inspect every fitting for leaks. Test heads, holding-tank indicators, macerator locks, Y-valves and pumpout connections. EPA guidance explains federal vessel-sewage rules, marine sanitation devices and no-discharge zones; state and local requirements may be stricter.
7. Safety and legally required equipment
Requirements depend on vessel size, type, propulsion and operating waters. The U.S. Coast Guard’s recreational-boating guide and your state agency are the controlling references—not a generic web checklist.
- Provide a U.S. Coast Guard-approved, serviceable and correctly sized life jacket for each person; make them readily accessible.
- Inspect throwable flotation devices where required.
- Check fire extinguishers for required type, quantity, condition and service status.
- Check visual distress signals and expiration dates for the intended waters.
- Test sound-producing devices and navigation lights.
- Confirm registration/documentation, numbering and required pollution or discharge placards.
- Inspect the anchor, rode, dock lines, fenders, boat hook and emergency tools.
- Update charts and navigation data; carry an appropriate backup.
- Test VHF radio and Digital Selective Calling without making a false distress call. Confirm the MMSI information is correct.
- Check EPIRB or PLB battery/service dates and update NOAA registration when ownership or contact information changes.
- Restock the first-aid kit and seasickness or personal medications.
The Coast Guard Auxiliary and America’s Boating Club offer a free Vessel Safety Check. It is a courtesy examination, not a law-enforcement boarding, and can help verify equipment and condition before the season.
8. Sailboat rigging and deck systems
Inspect the mast, standing and running rigging, chainplates, turnbuckles, pins, cotters, lifelines, winches and steering system. Look for broken wire strands, cracks, corrosion, distortion and chafe. Rigging failures can be sudden and severe; use a qualified rigger when age, history or condition is uncertain.
Reeve and secure lines carefully, inspect sails and reefing systems, and verify that emergency tiller access and operation are understood.
9. Immediately after launch
- Keep lifting or haul-out assistance available until initial leak checks are complete.
- Inspect every accessible through-hull, seacock, hose connection, shaft seal, transducer and drain for water entry.
- Check the bilge repeatedly, not only once.
- Open seacocks only for systems being commissioned, using the boat’s normal procedure.
- Start the engine according to the manual and immediately confirm cooling-water flow, oil pressure, charging and normal exhaust.
- Look and smell for fuel, exhaust, cooling-water and electrical problems.
- Test steering and shift controls while securely moored and with the area clear.
Shut down for abnormal temperature, pressure, vibration, smoke, alarms, fuel odor, exhaust leakage or rapidly rising bilge water.
Commission systems one at a time
A staged approach makes faults easier to identify. Avoid turning on every breaker, opening every seacock and starting every appliance at once. Begin with the systems needed to keep the boat afloat and under control, then add one load or fluid circuit at a time while watching the bilge, electrical panel and machinery spaces.
- Confirm all below-waterline closures and inspect for leaks.
- Energize the essential DC circuits and verify battery voltage before adding large loads.
- Commission the engine and cooling circuit, then shut down and reinspect.
- Pressurize fresh-water plumbing and check fittings before leaving it unattended.
- Test sanitation, refrigeration, electronics and comfort equipment individually.
- Connect shore power only after visually inspecting the pedestal, cord and inlet and following marina and equipment procedures.
Write down the time and conditions when an intermittent symptom occurs. Useful notes include engine speed, temperature, battery voltage, which pumps or chargers were operating, weather and whether the symptom appeared before or after launch. Photos of stains, fluid levels and meter readings can help a technician diagnose a problem that disappears at the dock.
Build a commissioning record
Record service dates, fluid and filter specifications, battery measurements, safety-equipment expiration dates, observed defects and who completed each task. Do not mark a task complete merely because a system turned on. A meaningful record says what was inspected or measured—for example, that the automatic bilge switch activated and the discharge was observed—not simply “bilge checked.”
Create a short unresolved-items list with an owner and deadline for every defect. Classify anything involving flooding, fire, fuel, propane, steering, propulsion, rigging, carbon monoxide, shore power or required safety equipment as a departure blocker until properly resolved. Lower-risk cosmetic work can remain on the seasonal list without obscuring safety-critical items.
Keep the completed checklist aboard or in a shared digital record. It becomes a baseline for later troubleshooting and makes next season’s commissioning faster because winterization changes, recurring leaks and component ages are documented.
10. The first sea trial
Choose daylight, settled weather and uncrowded water. Carry required safety gear, tools and a capable second person. Tell someone ashore the plan. Start close to the launch point or marina and increase load gradually.
- Verify steering, throttle, shifting and neutral engagement.
- Monitor oil pressure, coolant temperature, charging voltage and alarms.
- Listen for vibration and inspect for leaks after each operating stage.
- Test navigation instruments, VHF, trim tabs, autopilot and other equipment in a controlled manner.
- Practice stopping and low-speed handling before approaching a crowded dock.
- After returning, recheck fluids, clamps, battery terminals, bilge level and running gear.
Do not launch or depart if you find
- a fuel or propane leak or unexplained odor;
- uncontrolled water entry or an unreliable bilge pump;
- a damaged through-hull, seacock, hose or shaft seal;
- unsafe steering, throttle or shift control;
- overheating, low oil pressure, smoke or critical alarms;
- damaged shore-power equipment or an electrical fault;
- missing legally required safety equipment;
- serious hull, rudder, propeller, drive or rigging damage.
Bottom line
Commissioning is a controlled return to service, not simply putting the plug in and starting the engine. Inspect ashore, test at the dock, verify safety equipment, then complete a conservative sea trial. Record what was checked, what was serviced and what still needs attention so the first family outing is not the first systems test.
Sources: U.S. Coast Guard guide to federal requirements for recreational boats; U.S. Coast Guard boating-safety FAQs; BoatUS Foundation spring fitting-out checklists; EPA fuel-spill prevention for boat owners; EPA recreational-boater vessel-sewage guide.

Stay in the loop
Get the latest nautical soundings updates delivered to your inbox.