Marine Battery Not Charging — What to Check First
Marine battery troubleshooting has gotten complicated with all the conflicting advice flying around. As someone who spent half a Saturday afternoon convinced my alternator was completely toast — only to discover a corroded terminal that looked like a crusty baked potato — I learned everything there is to know about diagnosing this problem the expensive way. Today, I will share it all with you.
We’re going through a real troubleshooting sequence here. Start with what you can actually see and touch, move into simple voltage tests using a basic multimeter (the $9 Harbor Freight kind works fine, honestly), and land on a clear answer: battery, alternator, or charger. That’s the goal.
Start Here — Check the Obvious Before Anything Else
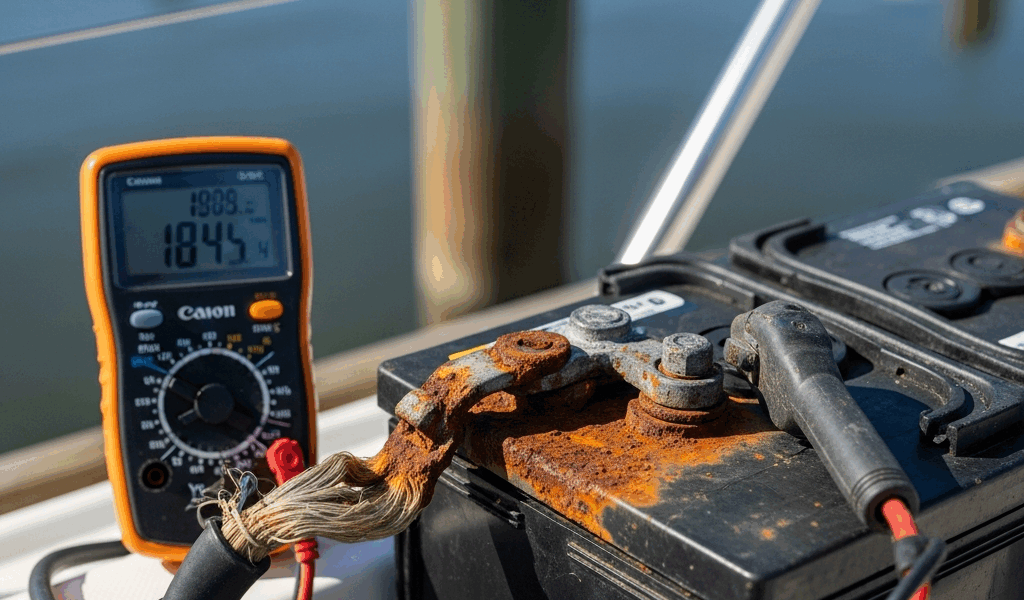
Before you even think about pulling a multimeter out of the cabin, walk the boat and look at your battery terminals. Really look at them.
Corrosion on marine terminals is unmistakable — chalky, crusty buildup in white, blue, or green sitting right where the cable meets the post. That stuff acts as a resistor. Electrons can’t do their job through it. And boats collect it fast, because salt air and constant vibration are a terminal’s two worst enemies. That’s what makes proper terminal maintenance so critical to us boaters.
So, without further ado, let’s dive in. Disconnect the negative cable first — always negative first, positive second when reconnecting. Scrub the corrosion off with an old toothbrush or a dedicated terminal brush. Home Depot sells a $4 double-ended tool specifically for this job. Stubborn buildup? Pour a little baking soda mixed with water directly on it. Wait 60 seconds. The fizzing action breaks down the oxidation. Wipe clean, reconnect, and test again before touching anything else.
Check the physical connection while you’re there. That terminal clamp should be tight enough that you genuinely cannot wiggle the cable by hand. A loose connection creates a resistance gap that starves the battery of charging current. Snug it down with a wrench — usually 10mm or 12mm depending on your terminal hardware. Don’t overtighten it. Hand-tight plus a half turn is enough.
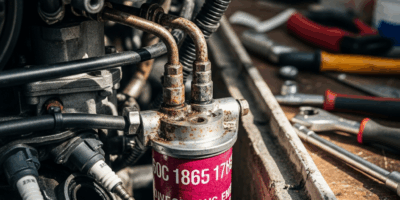
Now find your battery fuse. On outboard-powered boats there’s usually an inline fuse holder sitting somewhere between the alternator output and the battery — might be a 60A ANL fuse in a black plastic housing, or a blade fuse tucked into the breaker panel. Check whether it’s blown. A blown fuse tells you something went wrong upstream in the charging circuit. Replace it with the exact same amperage rating. Don’t ever jumper it with copper wire or aluminum foil. That’s genuinely how boats catch fire.
Shore power setup? Look for the breaker panel near your onboard charger. Two different boat owners I know personally tripped that breaker, forgot about it, then spent an hour diagnosing a charger that was simply getting no power. Flip it back on. Move forward.
Probably should have opened with this section, honestly. Nine times out of ten, the fix lives right here.
Test the Battery Itself With a Multimeter
But what is a resting voltage test? In essence, it’s a quick snapshot of your battery’s state of charge with no load and no charging input running. But it’s much more than that — it also tells you whether a dead cell might be dragging the whole battery down.
Grab the multimeter. Set it to DC voltage. Touch the probes directly to the metal battery posts — not the cable ends, the actual posts on the battery itself.
Engine off, no charger running. What’s the number?
- 12.6V or above: Battery is in solid shape at rest.
- 12.0 to 12.4V: Battery is low but not dead. It needs charging.
- Below 11.8V: Battery is deeply discharged or has a failing cell. This is sulfated-battery territory.
Here’s where it gets interesting. I’m apparently the type who trusts a resting voltage reading too much, and that habit works for me right up until it doesn’t. A battery reading a clean 12.6V at rest can still collapse completely under load. Don’t make my mistake. I found this out during a two-week trip when the battery tested perfectly at the dock, then dropped to 9.1V the moment I tried to crank the engine. Failing battery masquerading as a healthy one.
You need a load test to catch this properly. A dedicated load tester runs $200 or more. The practical shortcut: turn on your cabin lights and watch the multimeter for 30 seconds. Voltage holds above 12.0V? The battery has real reserve capacity. Drops below 11.5V? Weak or internally damaged.
A shorted cell won’t charge regardless of what you connect to it. It’ll sit at 10.5V for hours on a charger and never move. Resting voltage consistently below 11.8V usually means you’re buying a battery, not fixing a charging system. Keep going through the checklist anyway before pulling the trigger.
Check Whether the Alternator Is Actually Charging
Start the engine. Let it idle for about 30 seconds — enough time for the alternator to spool up properly.
Multimeter back on the battery posts with the engine running. What are you seeing?
- 13.8 to 14.4V: Alternator is working correctly. Charging system is fine.
- Below 13.5V: Alternator output is weak or absent.
- Same as the resting voltage: Alternator is producing nothing.
Voltage climbs above 13.5V when the engine runs? Your charging system is functional. The problem is almost certainly the battery — sulfated, damaged internally, or simply too far gone to accept a charge.
Voltage stays flat? Now you need a second test. Find the alternator output wire — heavy red cable running from the alternator to the battery or to an inline fuse. Test voltage directly at the alternator output terminal with the engine running. High voltage there (14V or above) but nothing at the battery? Bad wire or bad connection somewhere in between. Low voltage at the alternator terminal itself? The alternator is failing internally.
One thing worth knowing: small outboards — anything south of 50 horsepower — often run stators that barely produce enough current to maintain a battery at full throttle under ideal conditions. Running a 200Ah battery bank off a 30HP engine while sitting at idle or slow-trolling? The alternator cannot keep up with a battery that’s 50% discharged. It’s technically charging. Just not fast enough to make a dent. That’s the design ceiling of the engine — not a malfunction. In that situation, you need shore power charging time at the dock.
Onboard Battery Charger Troubleshooting
Boat lives at a dock on shore power? The diagnosis runs a little differently.
First — is the charger actually powered? Check that the shore power cord is fully seated and that the charger’s status lights are on. No lights means no power. Walk to the dock pedestal. Plug in a phone charger or a lamp to confirm the receptacle is live. No power at the pedestal is a dock problem, not a battery or charger problem.
Second — breaker between the shore cord and the charger. Is it tripped? I know it sounds almost too obvious. I’ve personally watched two boat owners spend 45 minutes diagnosing a charger that had simply been switched off at the breaker panel. Flip it back on first.
Third — look at the charger face. Flashing red light? Error code on the display? Most smart chargers throw a fault indication when they detect a short, reverse polarity, or — most commonly — a battery that’s dropped too low to safely charge. Many modern chargers won’t initiate a charge on a battery sitting below 10.5V or 11V.
Deeply discharged battery might be the best option to address manually here, as the recovery process requires a gradual voltage ramp-up. That is because smart chargers are designed to refuse charging anything they interpret as potentially shorted — a safety feature that becomes an obstacle when a battery is just very flat. Disconnect the battery from the boat’s electrical system entirely. Connect it to a portable multi-stage charger with a deep recovery mode — a NOCO GENIUS10 or a CTEK MXS 5.0 both handle this well. Set it to trickle or recovery mode. Give it 12 to 24 hours. The charger will slowly walk the voltage up until the battery looks normal to the onboard charger again. Some units have a physical “Force Start” or “Recovery” button — press it and let it run.
Charger shows green, no fault codes, but battery voltage isn’t climbing after several hours? That’s a battery that can no longer accept a charge. Charger is working fine. Battery is done.
When to Replace the Battery vs. Fix the Charging System
Here’s the decision tree, simplified:
- Battery tests low at rest, drops further under load, and won’t climb with the engine running or charger connected: Replace the battery.
- Battery tests fine at rest and holds voltage under load, but alternator or charger output tests consistently low: You need alternator service or charger repair.
- Battery tests fine, charging system output tests fine, but the battery still drains overnight: Sulfation or dead cell. Replace the battery.
Battery age matters more than most people factor in. Marine batteries over four to five years old are genuinely unreliable — regardless of how they test sitting still at the dock. Internal plates degrade. Sulfation accumulates. If that battery is original equipment on a 2018 boat, it has probably reached the end of its useful life whether it admits it or not.
Frustrated by alternator problems or a charger stuck in persistent fault mode, most boaters end up calling the marina — and that’s the right call. Alternator replacement and charger repair need proper tools and trained hands. Everything else on this list — cleaning terminals, running multimeter tests, swapping a fuse, resetting a breaker, running a manual recovery charge — is legitimate dockside work you can handle in a Saturday afternoon with a $9 multimeter and a terminal brush from Home Depot.


Stay in the loop
Get the latest nautical soundings updates delivered to your inbox.